
When you need to enter multiple documents of the same type in one go, you can use the "Bulk Entry" option, this is available in create paper records.
This function is for use when completing repetitive data entry (e.g. batch reports or standalone enrolment forms) where many records share the same document type and classification. If you are wanting to enter a single paper document instead, click here for the “Create a Paper Document” step by step guide.
Step 1
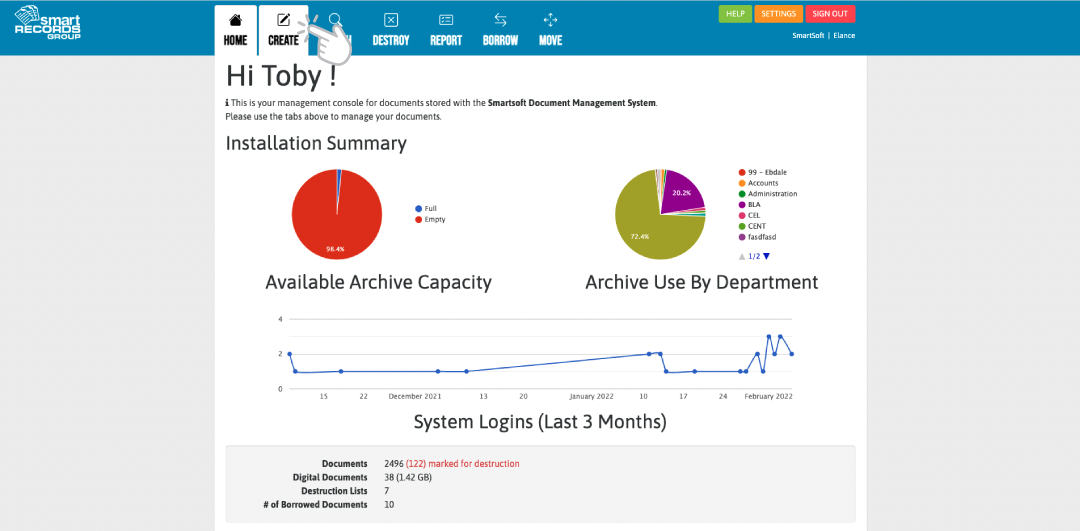
In the top menu, click "Create"
Step 2
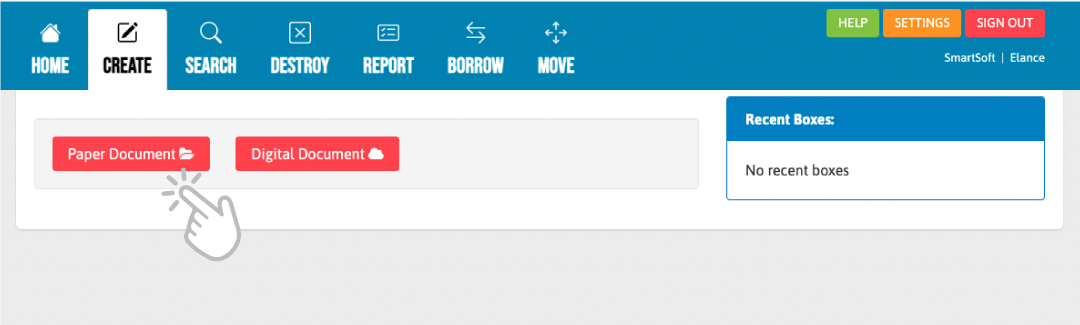
You will be shown two options for the types of documents you can enter, when archiving paper records (not scanned) select "Paper Document". You can also
Step 3
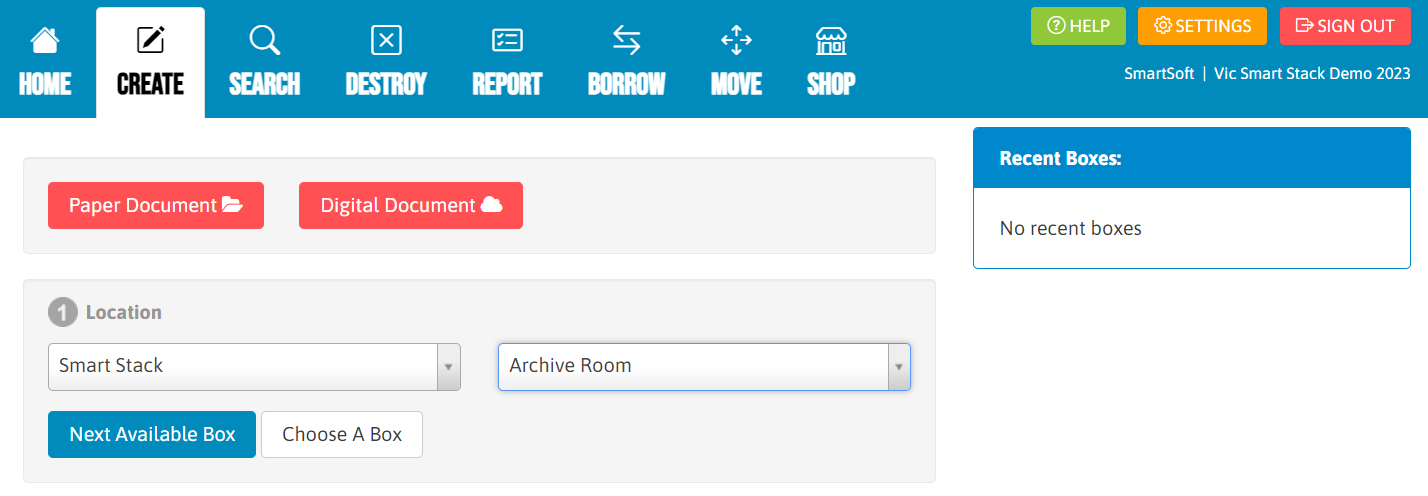
In Location, choose the organisation (your school) and the archive location (e.g. Archive Room). The options displayed here are dependent on what locations you have setup.
You may have multiple locations e.g. an archive room, storage container or offsite storage. Select the one where you will be storing the record you are archiving.
Hint: Once the location has been chosen, write the location onto the inner box straight away so you know where to place the box when you finish archiving!
Step 4
Choose which box you will use. "Next Available Box" will choose the next box the system has listed as available, "Choose A Box" allows you to select a specific empty box to enter items into.
Hint: "Choose A Box" will be of use if you are continuing archiving from a previous day and you know there is still space left in the box you were using.

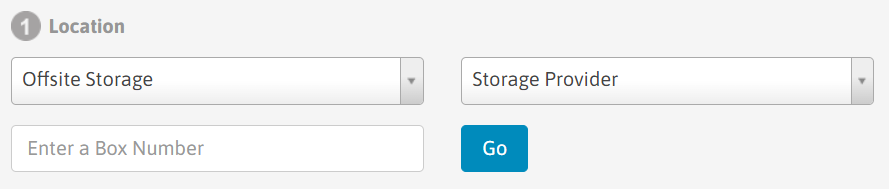
*If your archives are in an offsite location the system will ask you to enter a box number, the box number will be the barcode you will place on the archive box.
Step 5
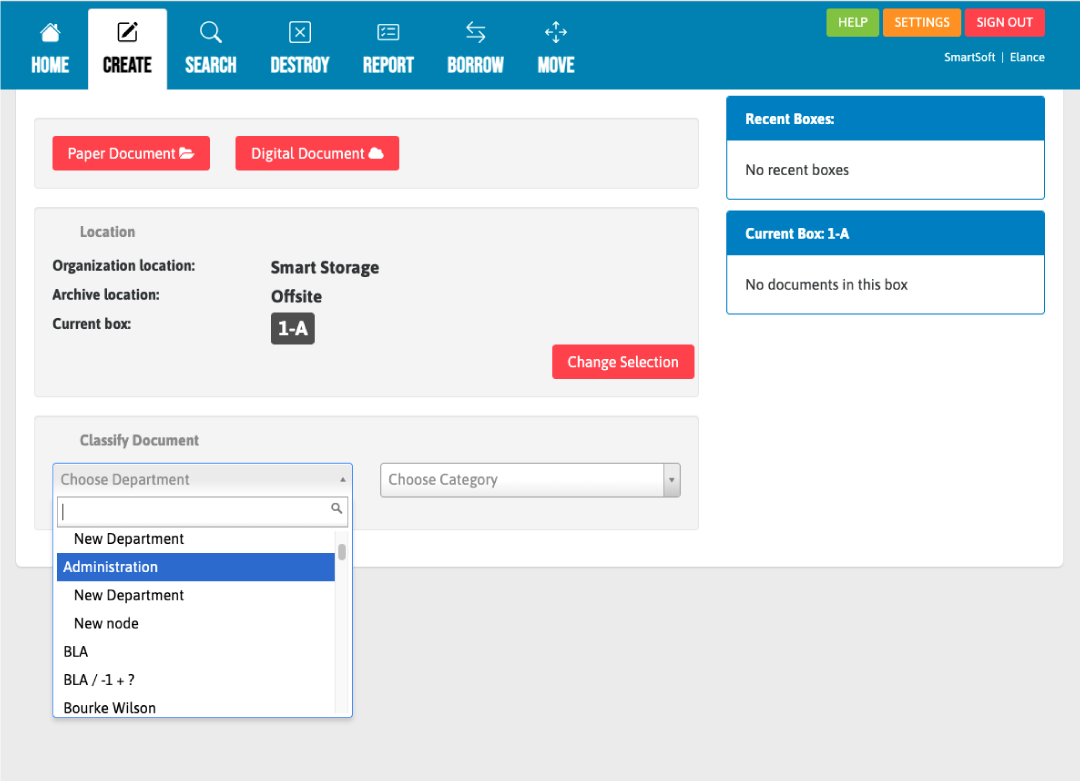
Classify the document, selecting which department and document type you are archiving
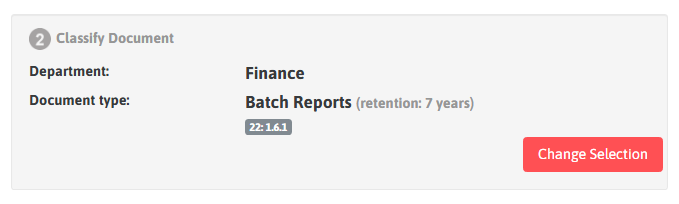
Below is an example of a financial record. The system will prepopulate the retention period for you.
Step 6
When you have selected your document type, you will then select "Bulk Entry", instead of "Single Entry"
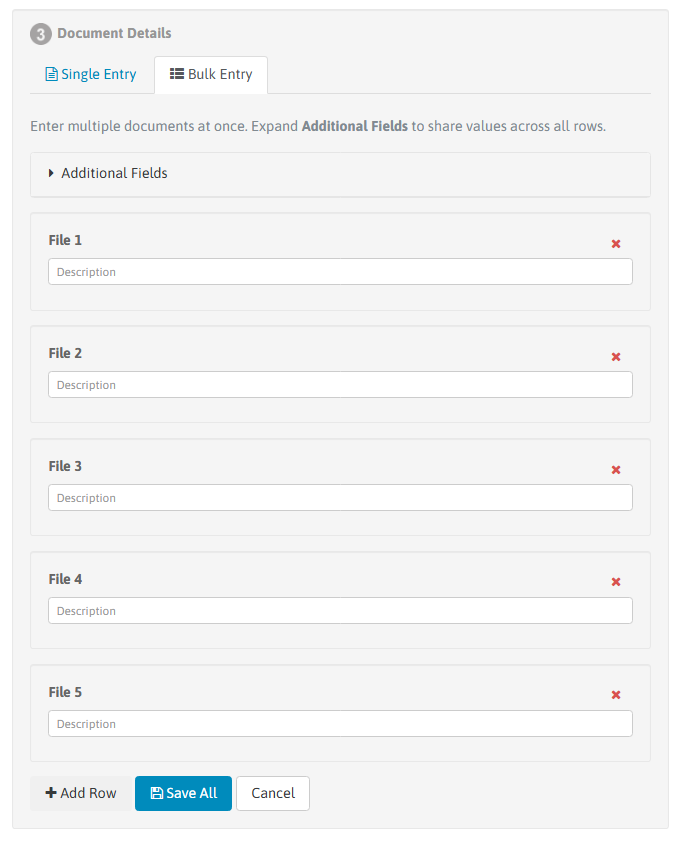
This will bring up multiple rows, which allows you to enter multiple records in a more efficient way. The button "+ Add Row" at the bottom will allow you to add more rows if you have more documents of this type to add.
Step 7
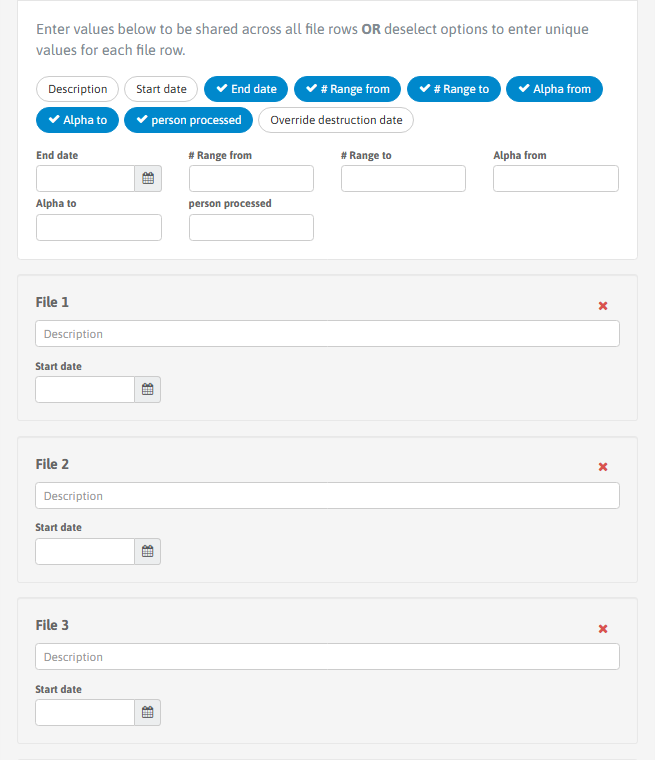
When doing bulk entry, there is a toggle at the top called "Additional Fields". When you click on this it will bring up a number of different options (that you would see when doing single entry).
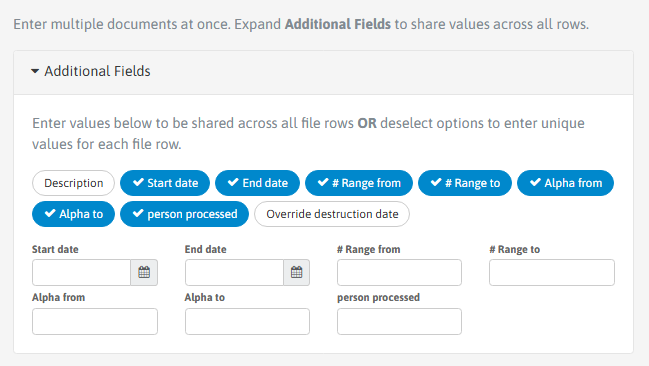
All of the options coloured blue and with a tick will share that information across all the documents listed in the bulk entry. If you want to individually specify any of these options, then you click on it to deselect it. It will then bring that option under the description for each document.
Step 8
Once you have added all the documents you wish to in the "Bulk Entry" function, you need to ensure you click the "Save All" button at the bottom of the page.
