When searching for documents the search function has the ability to add multiple filters.
When completing a search, we suggest starting your search as broad as possible with your search terms and departments to understand how your files have been archived in the past.
We have found that some organisations have had staff enter documents differently over the years of using the system, so if you're new to SmartSoft we suggest familiarising yourself with your archive structure to assist searching for documents.
Step 1
In the top menu click "Search". This will bring up the basic search bar.
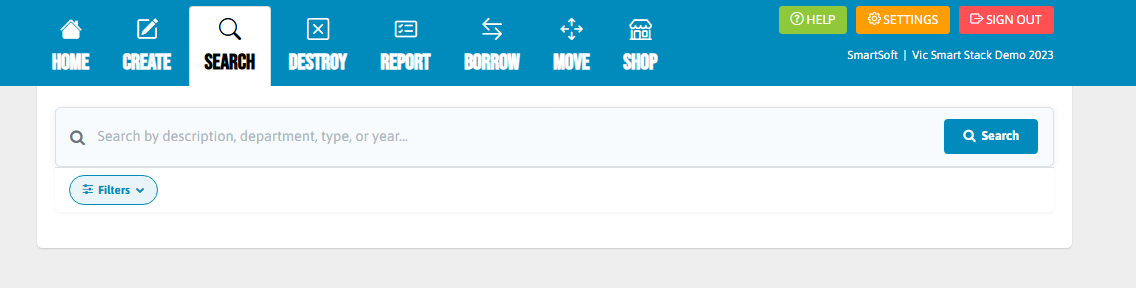
This search bar can be used to enter key words, such as names, or document names. We would suggest, if you are searching by name to go for either the first or last name alone first.
Step 2
You can then click on the "filters" button, which will bring up a number of filters that can be used to narrow your search.
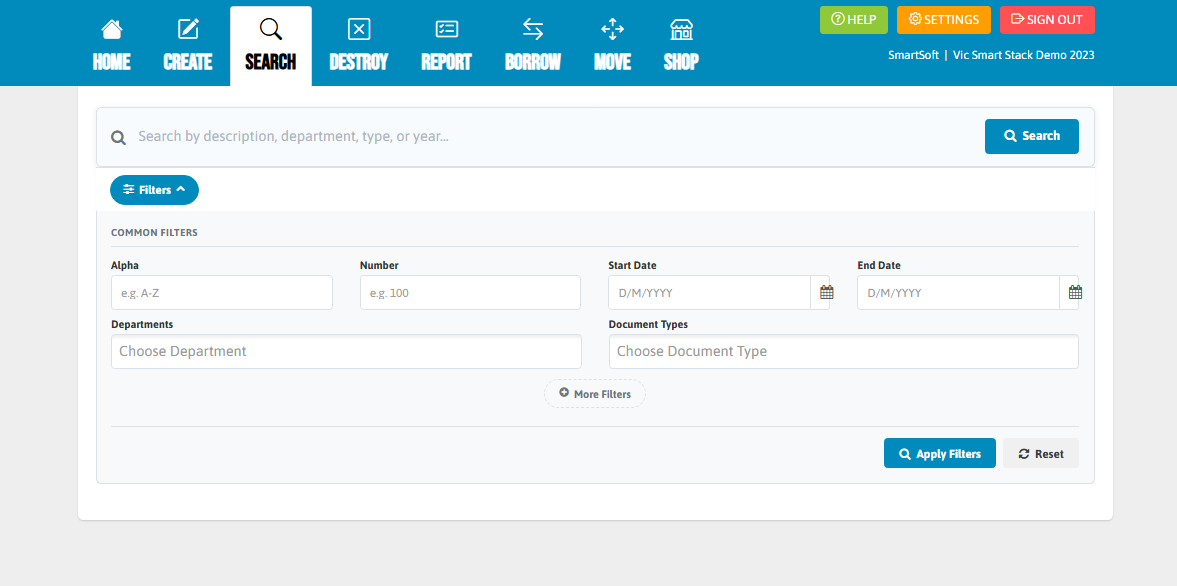
Common filters:
- Alpha: This will help us narrow our search and can be very helpful, for example, when having bundle documents like payroll where we can put the alpha range to determine the last names of the employees included in the files.
- Number: This can assist us when, for example, we have files bundled with different years.
- Start date & End date: This is useful if we know what years the documents were from, when searching the year is suggested we set the whole year from the 1st of January to the 31st of December.
- Any Department: Departments such as 'Administration', 'Finance', 'Student Records', 'Staff'.
- Any Document Type: This will show us the categories within each department.
Step 3
There is then the opportunity to add "More Filters" for a more advanced search.
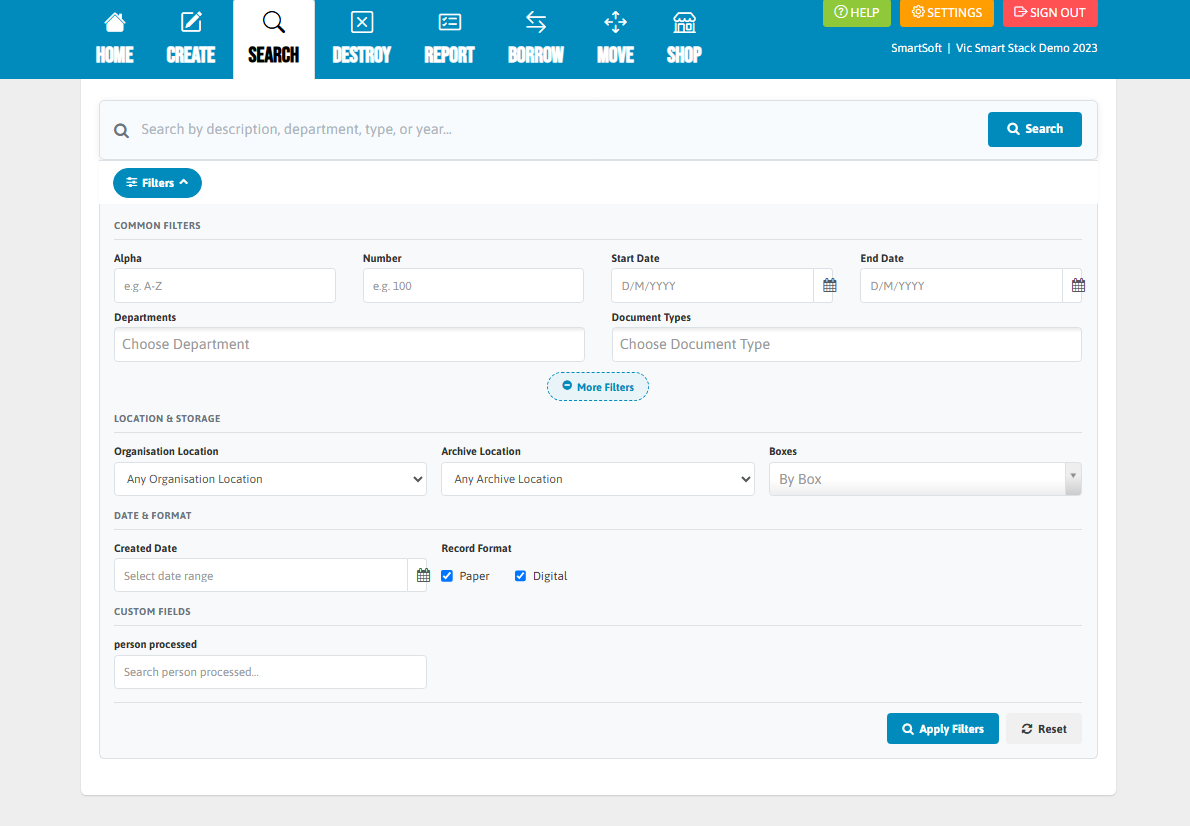
Location and storage
- Organisation Location: This will list your onsite and offsite storage locations.
- Archive Location: This will list the archive locations you have at your school.
- Boxes: This will list all of the box numbers you have which contain records.
Date & Format
- Created Date: This is where you can enter the date the record was filed if you are aware of this.
- Record Format: This is where you can filter if a record is paper or digital.
Custom Fields
- Person Processed: When you now archive a document in "Create" you can include the person who processed. This field can then be used to search via the member of staff who archived the record.
Step 4
Enter the search terms and filters for the document you wish to find and click "Apply Filters".
Note: It is important to remember if you are trying to conduct different searches with different filters then you need to click "Reset" if you want to clear filters previously applied.
Step 5
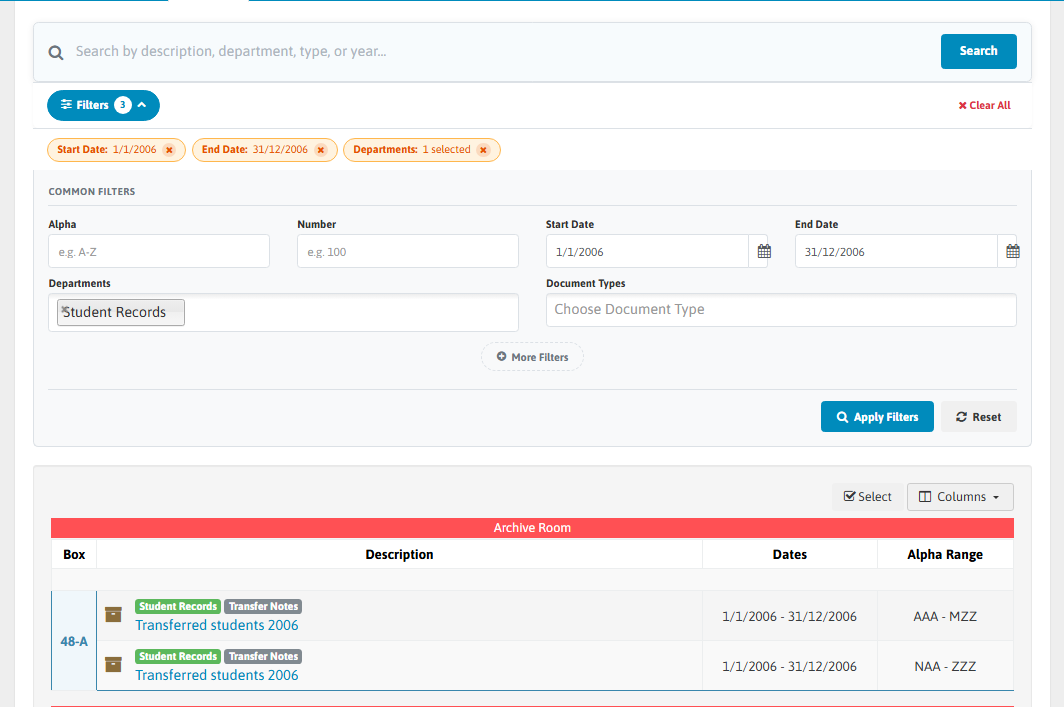
The results will show the location of where all the archives are located, the box that contains the document, the dates, the alpha and number range and the department and document type.

If no results are shown, try searching by year, department or document type.
For example: I am looking for a student's transfer documents. His last name is "Thompson", and he transferred in 2006. If I enter the last name no results are found.

If I enter the year from 01/01/2006 to 31/12/2006 I get results but there are too many, so I can also choose to add "Student Files" as the department in filers and I will get the below: